Throughout a regular workday or your classes, you will need to take screenshots on the laptop to capture your work, likely before its final form. Whether it’s Windows laptop/ PC or a Mac, you can capture stills of pretty much everything on the screen and save them as JPG or PNG files for later use. However, the steps for taking screenshots vary according to the software. Both Windows and macOS laptops come with their own set of ways or commands to capture a screenshot, and if you’re not well versed with them, it can be slightly challenging. But fret not, we’ve got you covered! Below are all the steps listed to take a screenshot on laptops/ PCs for Windows and macOS. The steps are simple and easy to get used to.
How to take screenshots on Windows laptop/ PCs
There are multiple ways to take a screenshot on laptops/ PCs powered by Windows. Take a look:
-
Snipping Tool
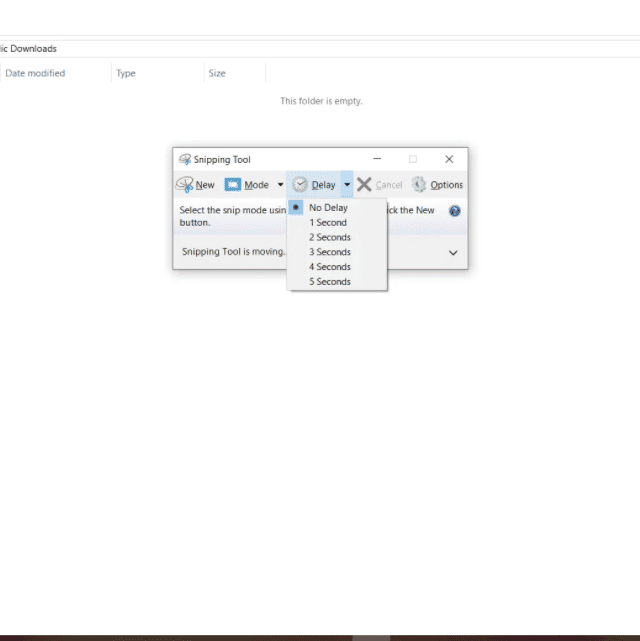
It’s an application in Windows specifically designed to take a screenshot on a Windows laptop. ‘Snipping Tool’ grabs a screenshot and saves it as an image file without first pasting it to another program. To do so, go to Start Menu and search Snipping Tool. The application will open with options such as ‘New’, ‘Mode’, ‘Delay’, ‘Cancel’, and ‘Options’. The New button will allow users to take a screenshot on a laptop in whichever form they prefer (freeform, without any preset dimension or shape). The ‘Mode’ option, on the other hand, allows you to choose the kind of screenshot shape you want – you can choose anything from full screen to rectangular to a free-form shape. The ‘Cancel’ button will put the process off, while the ‘Delay’ option will let you set a timer for taking a screenshot. -
PrtScn
Press the PrtScn key from the keyboard to take a screenshot of the entire screen of the laptop in a clipboard, which you can then paste it on Paint, Microsoft Word, or any other program that displays an image. On some laptops, the button might be need assistance from the Function key, labelled as ‘Fn’. Press Fn+PrtScn to take a screenshot on such computers. -
Alt+PrtScn
This option copies only the active window — the screen you’re working on — to the clipboard, which you can then paste into another program. -
Windows key+Shift+S
Want to capture a specific portion, press these three keys together. This will dim the screen and change the mouse pointer to drag and select the portion you want to capture. The screenshot will be copied to the clipboard, which you can then paste on any program that supports an image. -
Windows key+PrtScn
If you don’t want to copy the screenshot to the clipboard, use this command to save it as an image file. Pressing the keys will take a screenshot of the entire screen and stores it in the “Pictures” folder, in a subfolder called “Screenshots”. -
Windows key+G
This option is for gamers who want to take a screenshot on a Windows laptop. Pressing the two keys together, while playing the game, will show a game overlay. Click on the camera icon or press Windows key + Alt + PrtScn keys to take a screenshot. The screenshot will be saved to the “Videos” folder in a subfolder called ‘Captures.’ Those playing games on steam can press F11 to take a screenshot, which you can then access from the ‘Steam’ folder.
How to take screenshots on macOS laptops/ PCs
macOS also has a bunch of options to take a screenshot and each one of them has its own benefits.
-
Command+Shift+3
It’s the easiest way to take a screenshot on macOS laptops/ PCs. Simply, press these three keys together, and it’ll capture a still of the entire screen. -
Command+Shift+4
This is a slightly advanced command that lets you capture a specific portion of the screen. It’ll turn your cursor into a crosshair, which you select and drag anywhere around the screen to take a screenshot.
– Additionally, you can press and release the space bar, which will turn the crosshair into a little camera icon. Hover the icon over the window you want to capture so it highlights, and then click on it or press enter.
– Press and hold the space bar with this command (after dragging to highlight an area but before releasing the mouse button or trackpad) to lock in the shape and size of the selected area and reposition it anywhere on the screen. This is handy if the initially selected area is a little off.
– Lastly, you can hold ‘Shift’ key after dragging to highlight an area, but before releasing the mouse button, to lock each side of the selected area, while keeping up or down to position the bottom edge free. -
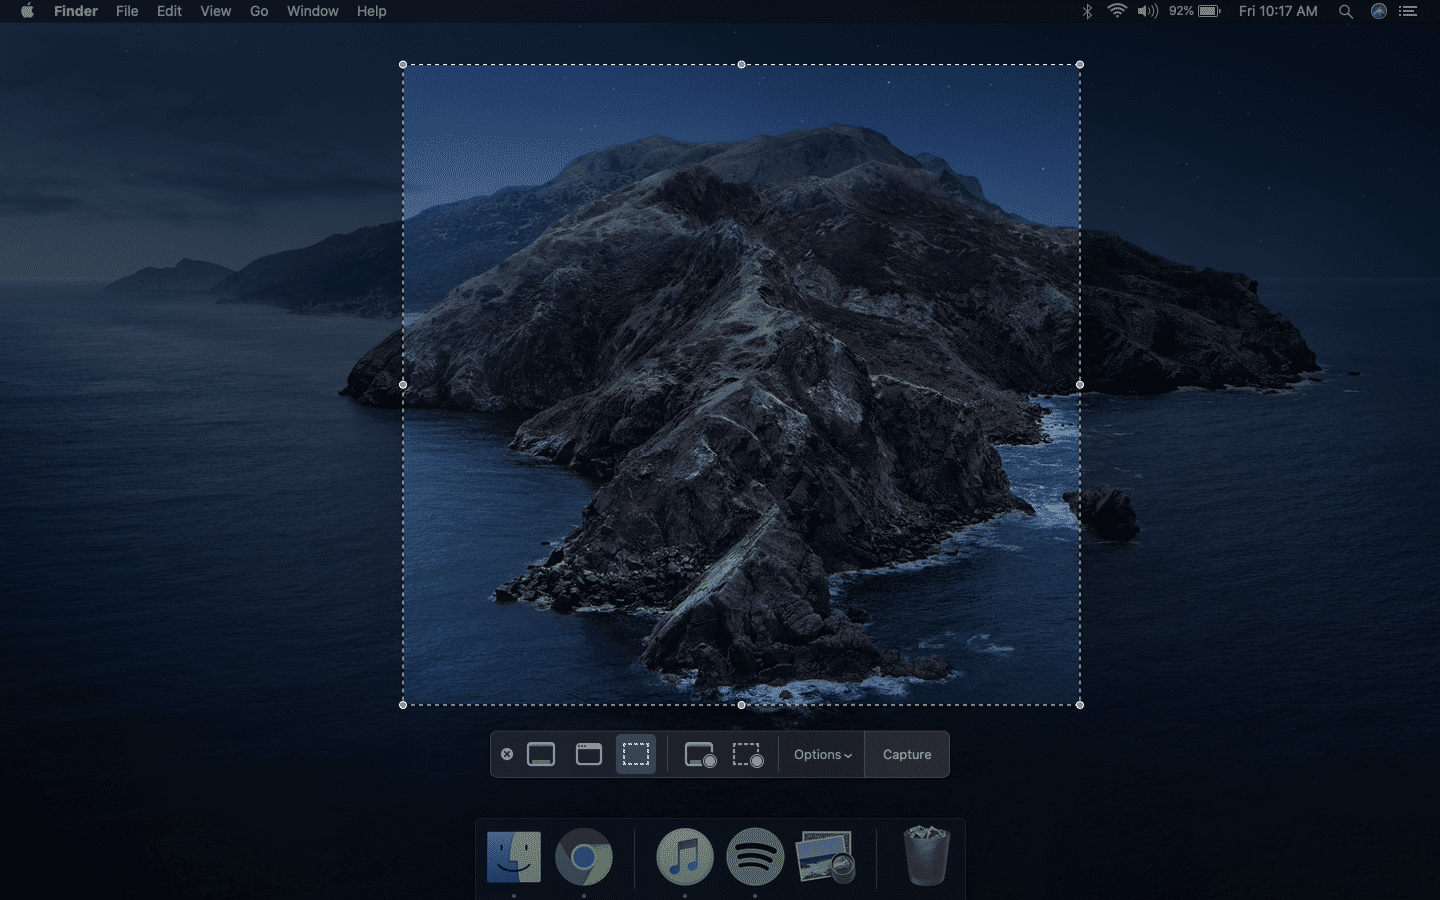
Command+Shift+5
This option basically gives you a free-hand over the screenshot. Once the command is invoked, you see a box on the screen, which you can adjust according to your liking, and a bunch of other options. You can simply press ‘enter’ to take a screenshot of the selected area or select ‘Capture selected portion’ option from the small panel below.
– The panel also comprises ‘Capture Entire Screen’ and ‘Capture Selected Window’ buttons, along with two video-recording buttons that let you record your entire screen or a selection of it and an ‘Option’ button to select the drive you want to save screenshots, set timer, among other things. On the left is an ‘X’ button to close the screenshot panel, which can be done with Escape key. -
Command+Shift+6
This option is only available for MacBook version with Touch Bar as it lets you take the screenshot of the Touch Bar.
from 91mobiles.com https://ift.tt/334F1CC
Post a Comment